Trumpet Assembly – YouTube.
Be sure to have the following handy:
- a dry rag (not Mom’s good towels—an old t-shirt should work)
- Slide Grease
- Valve Oil
Slides
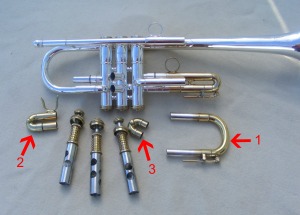
Begin with the tuning slide, the largest slide. Put a small amount of grease on the slide and spread it around with your finger. If you use too much grease, just wipe it off with your rag when the slide is pushed all the way in. Continue with the other slides in the order indicated, putting slide grease only onto the exposed parts of the slide, whether they are attached to the slide of the body or the trumpet itself.
Next, make sure the valve caps are dry and free of dirt. When they are, screw the valve caps back onto the bottom of the valve casings. Once that is done, oil each valve before inserting it into the proper casing. Do this over a towel to catch any oil that may drip.
Valve
Find the valve that is stamped with the number 3. Turn the valve as you drip oil over it to coat all sides. You only need to use a few drops. If you use too much, it will just drip off the valve. When it has a thin coat, gently slide (never force!) the valve into the 3rd valve casing (the one that is farthest from you as you play). Remember to make sure that the number is facing the same way that it was when you removed the valve. Once the valve is in, twist it a little until you hear a “click,” and then screw the valve nut down to secure the valve.
Do this with the other two valves as well.
After everything is back together, put your mouthpiece in and play your trumpet. If the notes don’t come out easily, you probably have a valve in the wrong spot. Take each valve out and make sure that they are in the right valve casing and that the numbers are facing the right way. Then try it again. If it still does not work, take your trumpet to school or an instrument repair person. They will probably be able to fix it right away without any problems.

